


Whether you are uploading a video to a social networking site or sending clips to your friends using any chatting app, adding subtitles is always a good idea. There are several ways to add subtitles to a video, but it takes time to find the right software and then its instructions. So, we will walk you through the step by step instructions on Movavi Video Editor – which is one of the easiest applications to add subtitles under any MP4 files. With support to fourteen languages and an impressive list of features, it will help you to add subtitles to all the formats of video clips and movies. Please scroll down.Step 1. Install the editor
 Download Movavi Video Editor, which is available for both Windows and Mac. Once downloaded, open the file, accept the agreement and click install.
Step 2. Import video
Once you open the editor, you have to select the first option: Create project in full feature mode. It will show you the instructions and other important options in a short tutorial. Close it and import the media that you want to work on. It is easy on Movavi, just click on Add Media Files, select the required media and the video will be added to its Timeline.
You can even record videos from its interface. It will be helpful if you are trying to create tutorials or any instructional clip. Click on Record Video to do that.
Step 3. Edit the video
Once you have the video, its editing is very easy using the options available just above the timeline. You have several handy options to reverse last changes, speed change, stabilization, add audio and some more straight and simple tools.
Step 4: Apply effects
Apart from adding text, you will find some impressive range of effects including Callouts, Transitions, and Stickers. To apply any of them, just drag and drop on the clip, wherever required.
Suppose you want to add a Title to the clip. Click on the large T from the left ribbon and you will see all the available Titles. Select any of them and drag it to the timeline to see its preview in the media player. Once you find the most suitable click, edit it and drag the same to the timeline. To edit the Titles, just double-click on the appearing text. You can move the Title sideways on the timeline until it gets the right place.
In a similar way, you can select Callouts that include circles, arrows, text bubbles etc. Callouts are useful if you are creating an educational or instructional video. Drag and drop the overlays to timeline once you find the right one. There are Stickers and Filters that can be applied following a similar process.
Customize the effects
Once you drag any of the effects like Titles or Callouts to the Timeline, double-click on it from the media player and you will edit its properties using the following options:
a. Clip properties to change its duration and speed
b. Font properties to manage the font size, style and appearance.
c. Color properties allow you to change the font and its outline color as well as width.
Click on apply once you are done making the changes
Step 4. Export the video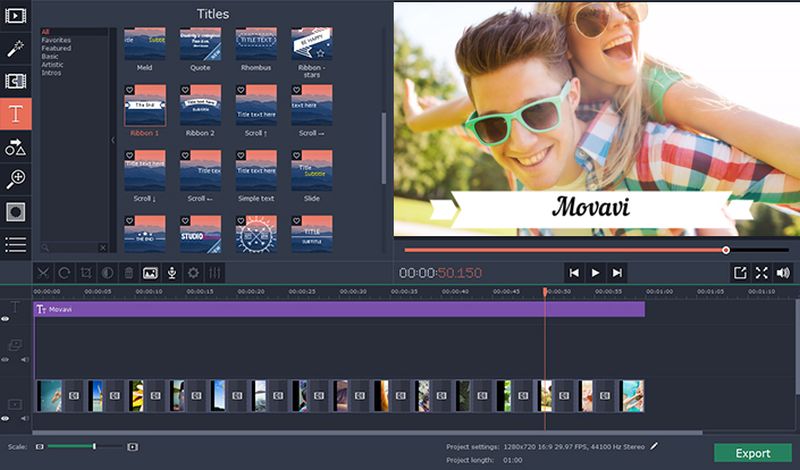
As you have created the masterpiece, click on Export at the right side bottom and select Save As Video. You can create subtitles for MP4, FLV, AVI, and many more. Here is an option to select in-built presets for Android, iPhone, PlayStation, and many other portable devices and television brands. Once done with the required selections, click on Start to save the video.